Showing posts with label Home. Show all posts

Tuesday, 24 September 2013

Rose, vanilla and peppermint lollies


This was my first attempt at making lollipops and it turned out to be much easier than I thought! But all the advice about handling hot sugar is true, I burnt myself a bit when pouring the melted sugar onto the silicon sheet and I must say, it's rather unpleasant. The great thing about this recipe is that you can make your lollipops in any flavour or colour you like. But if you want the colours to really shine through, I would suggest using liquid glucose rather than golden syrup (which I did). I chose vanilla, rose and peppermint for my 'pops (I'll let you guess which colour goes with which flavour).


To make 12 lollies you need:
250 g of sugar
50 g of liquid glucose (or golden syrup if you can't find any glucose)
100 ml of water
A few drops of food colouring and flavouring of your choice

1. In a pan, heat together the sugar, liquid glucose and water over a medium/high heat.
2. Let the mixture boil away for about 10 minutes or until it reaches the 'hard crack' stage (162°C). If you don't have a jam thermometer, dip a spoon in your sugar mixture and then put in a cup of cold water. If after a minute or so, the sugar on your spoon is rock hard, then you've reached the 'hard crack' stage. Otherwise, you need to let it cook for a bit longer.
3. Once the 'hard crack' stage is reached, dip the bottom of your pan in cold water to stop it from cooking any longer. Then add your flavouring and colouring and stir gently. If you're concerned about handling hot sugar, I'd suggest wearing oven gloves as you will need to pour the mixture from the pan into a jug.
4. On a silicon sheet or baking paper, pour 12, or so, circles of sugar. When done, place a stick in each before it cools down to much. Leave to set for about 30 minutes and enjoy!


Sunday, 8 September 2013

Langues de chat

No, no worries, I'm not going to start blabbering about cats. For those who know me, this is something I could easily do for hours. But no, as usual, I am here to talk about cakes and these 'langues de chat' or 'cat's tongues' are a French classic and a cup of coffee's best friends. Usually, they come plain without any fancy chocolate 'hats' on but I thought they might look a bit boring, so decided to give them a little twist. Anyway, without much further ado, here's the recipe.


For 16 langues de chats, you need:
60 g butter
60 g flour
60 g sugar
2 egg whites
A couple of drops of vanilla extract
80 g of white and/or dark chocolate
Food colouring of your choice

1. Preheat your oven to 200°C. In a bowl, beat the butter until creamy. Add the sugar, vanilla extract and flour and mix well. Add the egg whites and mix again.
2. Grease and flour a baking sheet. Put your biscuit mixture into a pipping bag fitted with a plain nozzle and pipe out little sticks about 6 cm long and 2 cm wide. Make sure there's sufficient space between each biscuit as they will spread when baking. Put in the oven for about 7 to 8 minutes. If piping is your thing, they should be slightly thicker at the ends and have a 'waist' in the middle. But they taste just as yummy without.
3. Meanwhile, melt your white and/or dark chocolate in the microwave on medium heat for a couple of minutes. If using white chocolate, add a couple of drops of the food colouring of your choice (I think pastel colours work best for this kind of biscuit, so a tiny hint of green or red/pink colouring is enough). Once your biscuits are baked and cool, dip one end in the chocolate and leave to rest on a cooling rack.
4. And now it's time to make a cup of coffee...


Sunday, 1 September 2013

Maltesers maze

I actually made this cake some time ago for my niece and nephew but, going through my pictures recently, I thought "why not include it in the blog?". It doesn't fall into the 'small cake' category but has this 'wow' factor (plus it's very easy to make and will please all the dark chocolate aficionados)! So here's what you need to know about it.


For the cake you need:
125 g butter, plus some for greasing
4 eggs
250 g caster sugar
150 g dark chocolate
125 g of sifted flour

For the ganache and decoration you need:
250 g of dark chocolate
25 cl of double cream
4 x 135 g packets of Maltesers (dark and/or white, whatever tickles your fancy)


1. For the cake, preheat your oven to 180°C. Grease two 20 cm round tins with a little butter and line with baking parchment. Melt the rest of the butter for 20 seconds in a microwave.
2. Separate the eggs. In a large bowl, use an electric whisk to mix the yolks with two-thirds of the sugar until it becomes pale. With a large knife, break the chocolate into small chunks and add to the yolk mixture together with the melted butter.
3. In another bowl, whisk the whites until firm and add the rest of the sugar until they become shiny. Then add the whites to the egg and chocolate mixture and fold in gently. Add the sifted flour and mix again.
4. Divide the mixture between the tins and bake for about about 30 minutes or until cooked (if a knife comes out clean when inserted into the middle of the cakes, then they're ready).
5. For the ganache, break the chocolate into small chunks and put them in a bowl. Bring the double cream to the boil in a small pan and pour over the chocolate. Mix well with a wooden spoon until the chocolate is completely melted and then, with an electric whisk, mix for another five to 10 minutes until it rises and cools down.
6. When the cakes are cool, spread some ganache with a palette knife on top of one of them then sit the other cake on the first one. With the rest of the ganache, completely cover both cakes, top and sides.
7. Now, you become the artist! Arrange your Maltesers in whichever way you like, your imagination is the limit. My only advice would be to make sure there are no gaps between them for a nicer effect.


Sunday, 18 August 2013

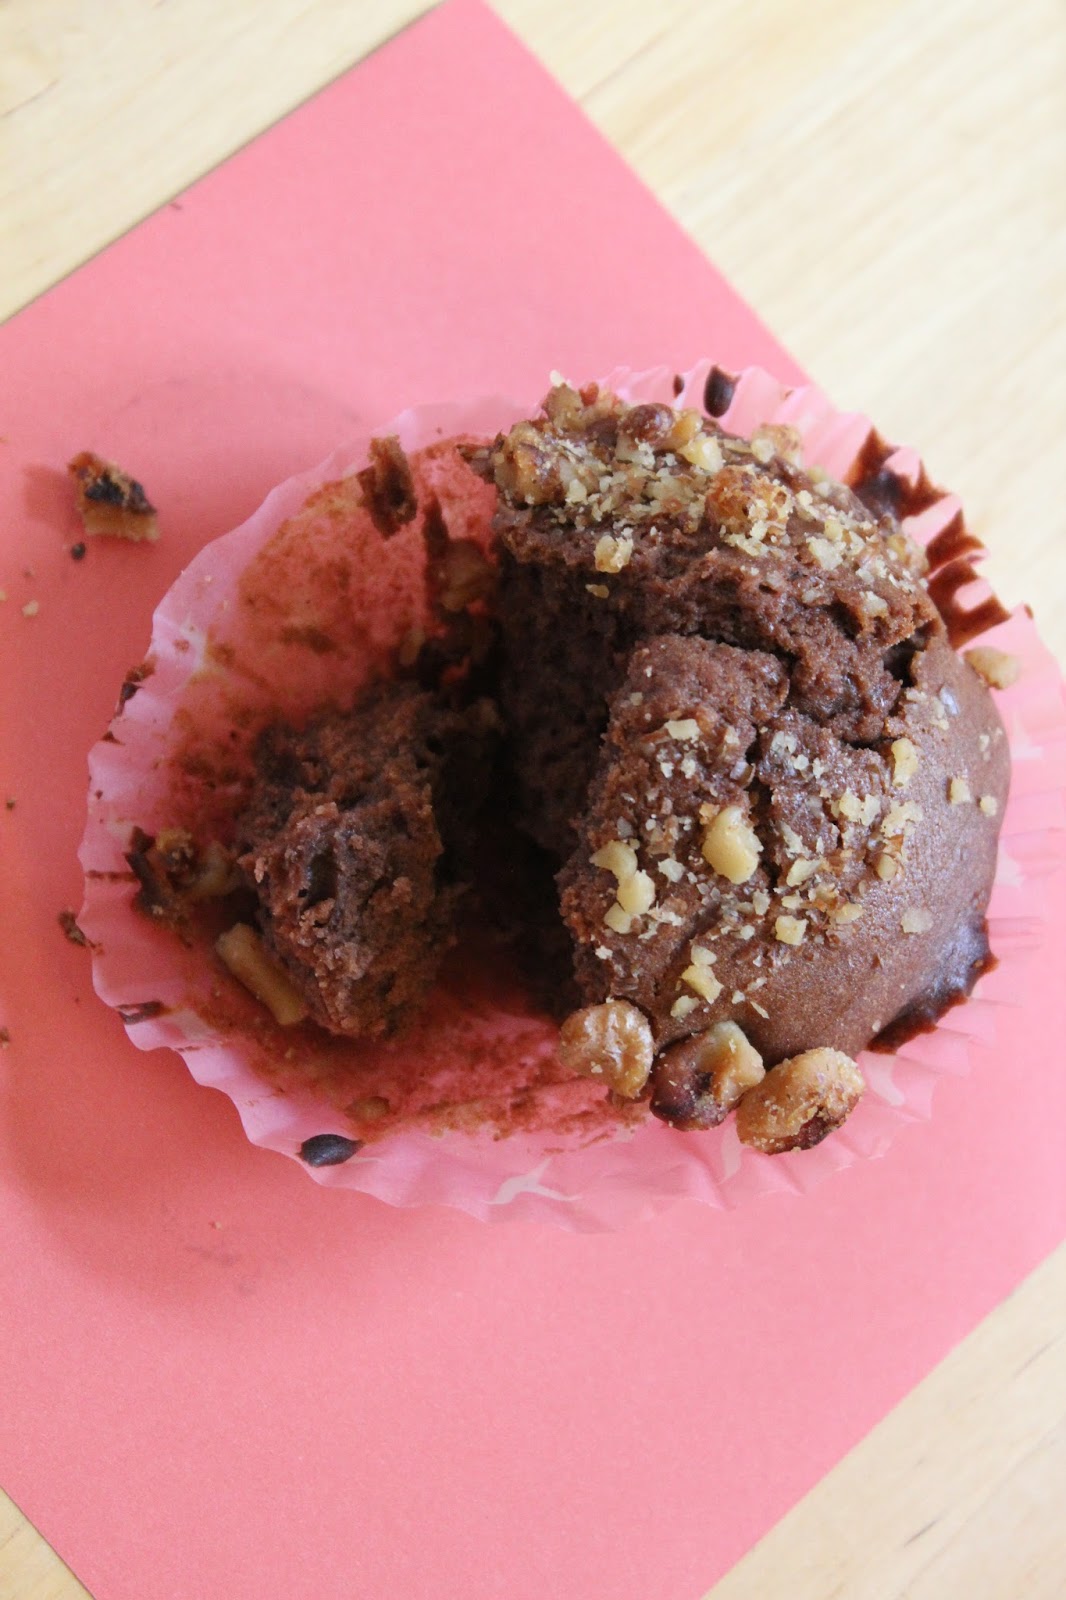
Chocolate and condensed milk muffins

I had some friends over the other day for brunch and the night before, my lovely other half suddenly told me: "We should make something sweet". Panic! Luckily, I had some dark chocolate (not enough though) and a can of sweetened condensed milk left in my cupboard and took inspiration from an old recipe to whip up those muffins.
Although they turned out really nice, I would suggest serving them fresh out of the oven, still slightly warm. Here are the ingredients I needed to make them.


To make 12 muffins you need:
100 g of dark chocolate
150 g of butter
3 eggs
A can of sweetened condensed milk
150 g of flour
70 g of walnuts
1 tsp of baking powder
A pinch of salt


1. Preheat your oven to 180°C. In a micro-wave safe bowl, break the chocolate and cut the butter into small chunks and heat for a couple of minutes (you can get the same result by placing your bowl over a small pan of simmering water but using the micro-wave is just a bit quicker).
2. In a big bowl, break the eggs, add the condensed milk as well as your mixture of butter and chocolate and whisk together.
3. Add the flour, half of the walnuts broken into small bits, the salt and baking powder and whisk again until you get a smooth mixture.
4. Place your mixture into muffin cases in a muffin tray, sprinkle the remaining bits of walnut on top and bake for 20-25 mins. Before switching off your oven, make sure the muffins are fully baked by inserting a knife into one of them.

I used walnuts but you can use whatever tickles your fancy (hazelnuts, chocolate chips, candied orange peel...be the master of your own muffins!)


Sunday, 28 July 2013

Marshmallow and white chocolate fudge

A clever, easy twist on a classic recipe...here, marshmallows simply replace the sugar. In under 25 minutes, this fudge will be ready but... you'll need to wait another three hours for it to be set. So cruel to have to wait so long but it's worth it! The recipe is inspired by the French cookery book 'Chamallows. Les 30 recettes cultes'.


To make the fudge you need;
20 marshmallows
120 ml of single cream
120 g of sugar
10 g of butter
1 tsp of vanilla extract
160 g of white chocolate
80 g of peanuts or any other nuts
A pinch of salt
Some oil


1. In a small pan, add together the cream, marshmallows, sugar and salt. Bring to the boil and stir continuously. Using a sugar thermometer, bring the mixture to 114°C then add the butter and vanilla extract. Stir well.
2. Chop the white chocolate and add to the mixture together with the nuts.
3. Line a square or rectangular tin with oiled baking paper on both sides. Poor your mixture and decorate it, if you wish, with little bits of white chocolate or any other cake decoration (here I used the little crunchy balls that you get with some yogurts, that's all I could find at the time).
4. Leave to set for at least three hours and then enjoy!


Sunday, 30 June 2013

Dark and white chocolate flowers

These flowers are really easy to make and yet look great with their black (the biscuit) and white (the ganache) contrast. I've shaped them as flowers just because I used the cookie cutters I have. But any shape will do. And they're so yum they disappear in a flash...see below!


To make 12 biscuits you need:
300 g of plain flour
25 g cocoa powder
120 g of icing sugar
200 g of butter
1 tsp vanilla extract
1 egg
200 g white chocolate
100 ml single cream


1. In a bowl, beat the butter until soft then add the icing sugar, vanilla extract and a pinch of salt. Add the egg and whisk until smooth. Sieve together the flour and cocoa powder and add to the mixture. Once well combined, cover the dough with cling film and leave to rest for at least two hours in the fridge.
2. Preheat the oven to 150°C. Roll out your dough and cut out 24 shapes, or more, with a 6 cm-diameter cookie cutter. With another 3 cm-cookie cutter, remove the centre of half the shapes. Bake your shapes on  a baking tray lined with baking sheet for 15 minutes. Leave to cool.


3. To make the white chocolate ganache, melt the white chocolate in a bowl placed over a small saucepan of simmering water. Separately, boil the cream and add to the white chocolate until you get a smooth mixture. Leave to set in the fridge.
4. On each full biscuit, place one teaspoon of ganache and cover with a hollowed biscuit. Et voila!


Sunday, 19 May 2013

Abricotines

I got this recipe from a book that I bought without even reading it first. It was all wrapped at the bookstore but the name on the cover - Ladurée - was enough to make me buy it.
Today, I'm making Abricotines (or Apricotines if you prefer). The original recipe uses apricot jam but I reckon it must be even better with raspberry jam. Btw, you'll notice that I've broken the 'three recipes a week using the same ingredient' rule (I'm such a rebel!).
Anyway, back to our Abricotines.


To make 30 little cakes you need:

170g of icing sugar
215g of ground almonds
35g of plain flour
6 egg whites
1 tsp vanilla extract
40g of granulated sugar
85g of flaked almonds
100g of jam (apricot, raspberry, cherry...whatever tickles your fancy!)

1. In a bowl, combine together the sifted icing sugar, ground almonds and flour.
2. In another bowl, whisk the egg whites to a foam. Add the vanilla extract and granulated sugar and continue whisking until firm.
3. Add the flour mixture to the egg whites and gently fold together until homogeneous.
4. Preheat the oven to 170°C. Put the batter in a piping bag fitted with a plain nostril. On a baking tray lined with baking parchment, pipe 2 cm-diameter circles. Sprinkle them with flaked almonds and bake for 12 to 15 minutes.
5. When cooked, take out of the oven. Once cooled, place a bit of jam on half the shells and top each with the remaining shells. Ta-dah...!


Sunday, 28 April 2013

Ricotta and lemon cakes

I'm back! After a few weeks off, let's start where we left off, with lemons. In this recipe, the sharpness of the lemon is balanced by the richness of the ricotta. Some would say ricotta is a bit boring but I absolutely adore it (one of my fondest food memories is a pizza ricotta in Padua, I still have tears of joy thinking about it). Anyway, let's get back to those little cakes. As always, very simple to make and a guaranteed success.

To make 6 little cakes (or one big one) you need:

220g of self-raising flour
180g of unsalted butter
210g of sugar
4 eggs
350g of ricotta
200ml of single cream
185ml of lemon juice
1 tps of lemon zest
Icing sugar (for dusting)


1. Preheat the oven to 180°C. Grease six little round moulds. 
2. In a bowl, mix together the flour, butter and half the sugar. Add one egg.
3. Place the mixture at the bottom of each mould and bake for 15 minutes. When baked, take out of the oven and lower the temperature to 150°C.
4. Mix together the ricotta, cream, lemon juice, lemon zest, the rest of the sugar and the three remaining eggs. Pour the mixture onto your baked bases and bake for another 30 minutes. Let the cakes cool for at least two hours in the fridge before serving. When ready, dust with icing sugar et voilà!


Monday, 18 March 2013

Lemon curd and raspberry cushions

Let's move on to lemons for the next three recipes. I called these little cakes 'cushions'  but they're halfway between madeleines and mini sponge cakes. In France, you could buy tiny madeleines filled with either chocolate, strawberry or apricot jam and this recipe reminds me a bit of them.
I'm also trying something new with the pictures, let see whether it'll work!


To make 12 cushions you need:

150 g of self-raising white flour
100 g of sugar
3 eggs
100 g of melted butter
Grated zest of one unwaxed lemon
60 g of lemon curd
A dozen frozen raspberries

1. Preheat the oven to 200°C. Grease a muffin tray (or a madeleine tray if you have one) with butter and then flour.
2. Beat together the eggs and sugar until thick and pale. Add the flour to the mixture, then the cooled melted butter and lemon zest. Leave it to rest in the fridge for at least a couple of hours, or overnight.
3. When ready, fill each of the moulds in the tray about 2/3 full and place a raspberry in the middle of each cushion/muffin/madeleine. Cook for 10-12 minutes until golden and baked through. Leave the cushions to cool in the moulds.
4. Take them out of the moulds when cooled and, with a pipping bag, squirt a dollop of lemon curd into the centre of each cushion. Finally, the wait is over and you can tuck into them straight away!


Chococo tartlets

Chocolate and coconut, what a great combination! In this recipe, the chocolate is in the pastry while the coconut has been made into a mousse. Inspired by one of my longest serving cookery books,'Recettes Fraicheur', this recipe makes four tartlets.


For the pastry you need:

75 g of plain flour
1 tbsp of cocoa powder
50 g of soft butter
2 yolks
30 g of caster sugar
A pinch of salt
Half a tsp of vanilla extract

For the coconut mousse you need:

25 g of shredded coconut
15 cl of whipping cream
15 cl of coconut milk
1 tsp of vege-gel
50 g of sugar
1 yolk

1. Mix together the flour, cocoa powder, soft butter, 2 yolks, salt and vanilla extract. Knead the mixture for a few minutes until you get a nice soft dough. Roll it into a ball and place it in the fridge for half an hour.
2. Preheat the oven to 200°C. Take the dough out of the fridge, divide it into four, roll out to about 3mm thickness and place it into greased tartlet moulds. With a fork, prick the dough then put tin foil on top and weigh down with baking beans. Cook for 10 minutes then lower the oven temperature to 180°C and cook for another 5 to 10 minutes until firm. Take the tartlets out of the oven and leave to cool.
3. Whip the cream until firm and thick. In a saucepan, mix the gelatine together with one tablespoon of water then place on a low heat and warm it through for 2 minutes.
4. In a separate pan, heat together the yolks, sugar and coconut milk. Let them simmer for a few minutes and then cool. Add the shredded coconut, gelatine and whipped cream to the mixture.
5. Pour the coconut mousse into the four tarlets moulds and leave them to set in the fridge for a couple of hours. Before serving, feel free to use a bit more shredded coconut and grated dark chocolate or cocoa powder to decorate your tartlets.


Monday, 11 March 2013

Coconut and raspberry dominos

This recipe is inspired by a little French cookery book titled 'Desserts'. Raspberries are not in season at the moment but frozen raspberries work just as well. I particularly like these little cakes, with the sweetness of the coconut balancing the acidity of the fruit.

To make 12 dominos you need:

140 g of flour
1 tbsp of ground almond
250 g of sugar
125 g of butter
A pinch of baking powder
2 eggs
Half a teaspoon of vanilla extract
1 tsp of lemon juice
150 g of frozen raspberries
45 g of coconut
A little icing sugar
Chocolate balls for decoration


1. Preheat the oven to 180°C. Grease a small rectangular dish with butter then line it with baking parchment.
2. Mix together 110 g of flour, the ground almond and 60 g of sugar in a large bowl. Add the butter and work the mixture until you get a nice soft dough. Place this dough at the bottom of your rectangular dish and cook for 20 minutes. Once golden, take the pastry out of the oven and lower the temperature to 150°C.
3. In a bowl, beat together the eggs, vanilla extract and the rest of the sugar with an electric whisk for 4 minutes. Then add the baking powder and the rest of the flour. Mix in the the lemon juice, the raspberries and the coconut and spread the mixture onto your pastry.
4. Bake for 30 minutes. Leave the cake to rest in its dish before dusting it with icing sugar and cutting it into 12 pieces. And if you have the time (and don't mind the hassle), you can place little chocolate balls on top to make them look like dominos.


Thursday, 7 March 2013

Coconut truffles

This week, it's all about coconut. As a child, I was not the biggest fan but over the years, I've learnt to really enjoy its sweet and versatile flavour. For the first of the three coconut-based recipes, I've chosen something über simple to make. Only three ingredients are required and it only takes a few minutes to make (although it needs to rest for at least a couple of hours).


To make 20 coconut truffles you need:

100 g of dessicated coconut
200 ml of condensed milk
20 hazelnuts
75 g of coloured sugar

1. Mix together the coconut and the milk and leave the mixture to set in the fridge for at least a couple of hours.
2. When the coconut mixture is ready, take a small amount, put a hazelnut in the middle then roll into a ball. Repeat the same process for the other 19 truffles.
3. Finally, roll the truffles in coloured sugar or in any other coating of your choice and hey presto!

For an alternative presentation just put a cake pop stick in each one and serve them as lollipops.


Monday, 25 February 2013

Pain perdu with cranberry compote

I'm using cranberries again but it will be the last time in a while (it's just that I bought a big pack so I need to use those cranberries in one way or in another).
In this recipe, I'm not using speculoos but some pain d'epices (or ginger bread), which is however flavoured with similar spices. It's also very nice with some brioche and makes the perfect tea time snack.


To make pain perdu for 4 persons you need:

Ginger bread (or slightly stale bread or brioche)
2 eggs
50 g of sugar plus some for dusting in the saucepan
Vanilla extract
20 cl of milk
20 g of butter

For the cranberry compote you need:

100 g of cranberries
80 g of sugar

1. Start with the compote. In a small pan, heat together the cranberries, the sugar and a tablespoon of water over a low-medium heat until the fruit is soft. Leave to rest then crush the fruit with a fork until you get a mushy compote. Taste and add more sugar if too sharp.
2. Once your compote is cool, mix together the eggs, the sugar, the milk and the vanilla sugar in a deep plate. Dip your bread, cut into thick slices, in the egg mixture for a few seconds.
3. In a saucepan, heat together the butter and a little bit of sugar over a medium heat. Add the sliced bread and cook for a couple of minutes on each side until golden.
4. Serve the warm pain perdu with the compote. Yum, yum...

Tuesday, 12 February 2013

Speculoos milk pudding with cherries

For this second recipe, I'm again using the speculoos spread but this can be easily replaced with a teaspoon of cinnamon, or crushed spiced biscuits. This recipe was inspired by a little French book entitled 'Speculoos Lotus, les 30 recettes cultes'.
Very simple and quick to make, these 'crèmes de lait' however need to set in the fridge for a couple of hours.


To make four puddings you need:
  • 4 tbsp of speculoos spread (or 30 g of crushed spiced biscuits, or 1 tsp of cinnamon)
  • 80 cl of milk
  • 40 g of corn flour
  • 100 g of frozen cherries (or any other red berries)
1. In a saucepan, mix together the milk, the corn flour and the speculoos. Bring to the boil then reduce the heat and leave to simmer until the mix thickens.
2. De-frost the cherries and place them at the bottom of four ramekins.
3. Pour the speculoos milk pudding onto the cherries and leave the ramekins to set in the fridge for two hours.
4. When ready to serve, de-mould the individual puddings onto plates. Et voilà!

Friday, 1 February 2013

Speculoos charlotte with cranberry coulis

Here we are, my very first post! I will start by introducing my blog, which is about food but more precisely about ingredients and recipes that I really enjoyed as a child. The aim, here, is to each week, pick an ingredient and create three recipes around it. Being French, some of the products used might not be easily found here in the UK but I will always try to suggest an equivalent product. Most of the recipes are very easy to make and use organic ingredients whenever possible.
For the first three posts, I've decided to focus on speculoos, a spiced biscuit particularly popular around Christmas time. The thought of it just makes me want to snuggle up under a blanket to eat those cinnamony treats while drinking hot chocolate. 
The other day, I was in the jam and honey aisle at the supermarket and hit upon a speculoos spread. Intrigued, I bought it and tried to find ways to use it. Here's my first idea: a Speculoos charlotte. The charlotte is one of my all-time favourite French desserts. So easy to make and so rewarding from a presentation point of view.


To make four little charlottes, you need:
  • 4 tbps of speculoos spread (or crushed spiced biscuits)
  • 20 cl of whipping cream
  • 12 ladyfingers
  • A few tbps of milk
For the coulis, you need:
  • 100 g of cranberries (plus 8, optional for presentation)
  • 2 tbps of icing sugar
  • Mint leaves (optional for presentation)
1. Whip the cream until firm. While whipping, add in the speculoos spread. Leave the mixture to set in the fridge for at least 30 minutes.
2. In the meantime, line four ramekins with cling film. Cut the ladyfingers in two and dip them for a few seconds in a bit of milk. Then, line the sides of the ramekins with the biscuits.


3. Put the whipped speculoos cream in the ramekins and leave to set in the fridge for at least another 30 minutes, or up until 24 hours.
4. For the coulis, put the cranberries together with the icing sugar and bit of water in a pan to simmer on a low-medium heat for about 30 minutes, making sure they don't burn. Once the cranberries are soft, crush them further with a fork before passing the coulis through a sieve. Because cranberries are quite sharp, add more sugar if the coulis is too tangy. Leave to cool in the fridge
5. Before serving, de-mould the charlotte onto a plate and place the coulis all around.

You can add a couple of cranberries and two mint leaves on top of the charlotte so it looks a bit like a Christmas pudding. Ok, it might be a bit late for Christmas but never too late for that charlotte. Enjoy!