Wednesday, 26 February 2014
Foovenirs has moved!
Continue following my recipes and more at www.foovenirs.com. I look forward to seeing you there!
Tuesday, 24 September 2013
Rose, vanilla and peppermint lollies

This was my first attempt at making lollipops and it turned out to be much easier than I thought! But all the advice about handling hot sugar is true, I burnt myself a bit when pouring the melted sugar onto the silicon sheet and I must say, it's rather unpleasant. The great thing about this recipe is that you can make your lollipops in any flavour or colour you like. But if you want the colours to really shine through, I would suggest using liquid glucose rather than golden syrup (which I did). I chose vanilla, rose and peppermint for my 'pops (I'll let you guess which colour goes with which flavour).

To make 12 lollies you need:
250 g of sugar
50 g of liquid glucose (or golden syrup if you can't find any glucose)
100 ml of water
A few drops of food colouring and flavouring of your choice
1. In a pan, heat together the sugar, liquid glucose and water over a medium/high heat.
2. Let the mixture boil away for about 10 minutes or until it reaches the 'hard crack' stage (162°C). If you don't have a jam thermometer, dip a spoon in your sugar mixture and then put in a cup of cold water. If after a minute or so, the sugar on your spoon is rock hard, then you've reached the 'hard crack' stage. Otherwise, you need to let it cook for a bit longer.
3. Once the 'hard crack' stage is reached, dip the bottom of your pan in cold water to stop it from cooking any longer. Then add your flavouring and colouring and stir gently. If you're concerned about handling hot sugar, I'd suggest wearing oven gloves as you will need to pour the mixture from the pan into a jug.
4. On a silicon sheet or baking paper, pour 12, or so, circles of sugar. When done, place a stick in each before it cools down to much. Leave to set for about 30 minutes and enjoy!

Sunday, 8 September 2013
Langues de chat
No, no worries, I'm not going to start blabbering about cats. For those who know me, this is something I could easily do for hours. But no, as usual, I am here to talk about cakes and these 'langues de chat' or 'cat's tongues' are a French classic and a cup of coffee's best friends. Usually, they come plain without any fancy chocolate 'hats' on but I thought they might look a bit boring, so decided to give them a little twist. Anyway, without much further ado, here's the recipe.

For 16 langues de chats, you need:
60 g butter
60 g flour
60 g sugar
2 egg whites
A couple of drops of vanilla extract
80 g of white and/or dark chocolate
Food colouring of your choice
1. Preheat your oven to 200°C. In a bowl, beat the butter until creamy. Add the sugar, vanilla extract and flour and mix well. Add the egg whites and mix again.
2. Grease and flour a baking sheet. Put your biscuit mixture into a pipping bag fitted with a plain nozzle and pipe out little sticks about 6 cm long and 2 cm wide. Make sure there's sufficient space between each biscuit as they will spread when baking. Put in the oven for about 7 to 8 minutes. If piping is your thing, they should be slightly thicker at the ends and have a 'waist' in the middle. But they taste just as yummy without.
3. Meanwhile, melt your white and/or dark chocolate in the microwave on medium heat for a couple of minutes. If using white chocolate, add a couple of drops of the food colouring of your choice (I think pastel colours work best for this kind of biscuit, so a tiny hint of green or red/pink colouring is enough). Once your biscuits are baked and cool, dip one end in the chocolate and leave to rest on a cooling rack.
4. And now it's time to make a cup of coffee...

Sunday, 1 September 2013
Maltesers maze
I actually made this cake some time ago for my niece and nephew but, going through my pictures recently, I thought "why not include it in the blog?". It doesn't fall into the 'small cake' category but has this 'wow' factor (plus it's very easy to make and will please all the dark chocolate aficionados)! So here's what you need to know about it.

For the cake you need:
125 g butter, plus some for greasing
4 eggs
250 g caster sugar
150 g dark chocolate
125 g of sifted flour
For the ganache and decoration you need:
250 g of dark chocolate
25 cl of double cream
4 x 135 g packets of Maltesers (dark and/or white, whatever tickles your fancy)

1. For the cake, preheat your oven to 180°C. Grease two 20 cm round tins with a little butter and line with baking parchment. Melt the rest of the butter for 20 seconds in a microwave.
2. Separate the eggs. In a large bowl, use an electric whisk to mix the yolks with two-thirds of the sugar until it becomes pale. With a large knife, break the chocolate into small chunks and add to the yolk mixture together with the melted butter.
3. In another bowl, whisk the whites until firm and add the rest of the sugar until they become shiny. Then add the whites to the egg and chocolate mixture and fold in gently. Add the sifted flour and mix again.
4. Divide the mixture between the tins and bake for about about 30 minutes or until cooked (if a knife comes out clean when inserted into the middle of the cakes, then they're ready).
5. For the ganache, break the chocolate into small chunks and put them in a bowl. Bring the double cream to the boil in a small pan and pour over the chocolate. Mix well with a wooden spoon until the chocolate is completely melted and then, with an electric whisk, mix for another five to 10 minutes until it rises and cools down.
6. When the cakes are cool, spread some ganache with a palette knife on top of one of them then sit the other cake on the first one. With the rest of the ganache, completely cover both cakes, top and sides.
7. Now, you become the artist! Arrange your Maltesers in whichever way you like, your imagination is the limit. My only advice would be to make sure there are no gaps between them for a nicer effect.

Sunday, 18 August 2013
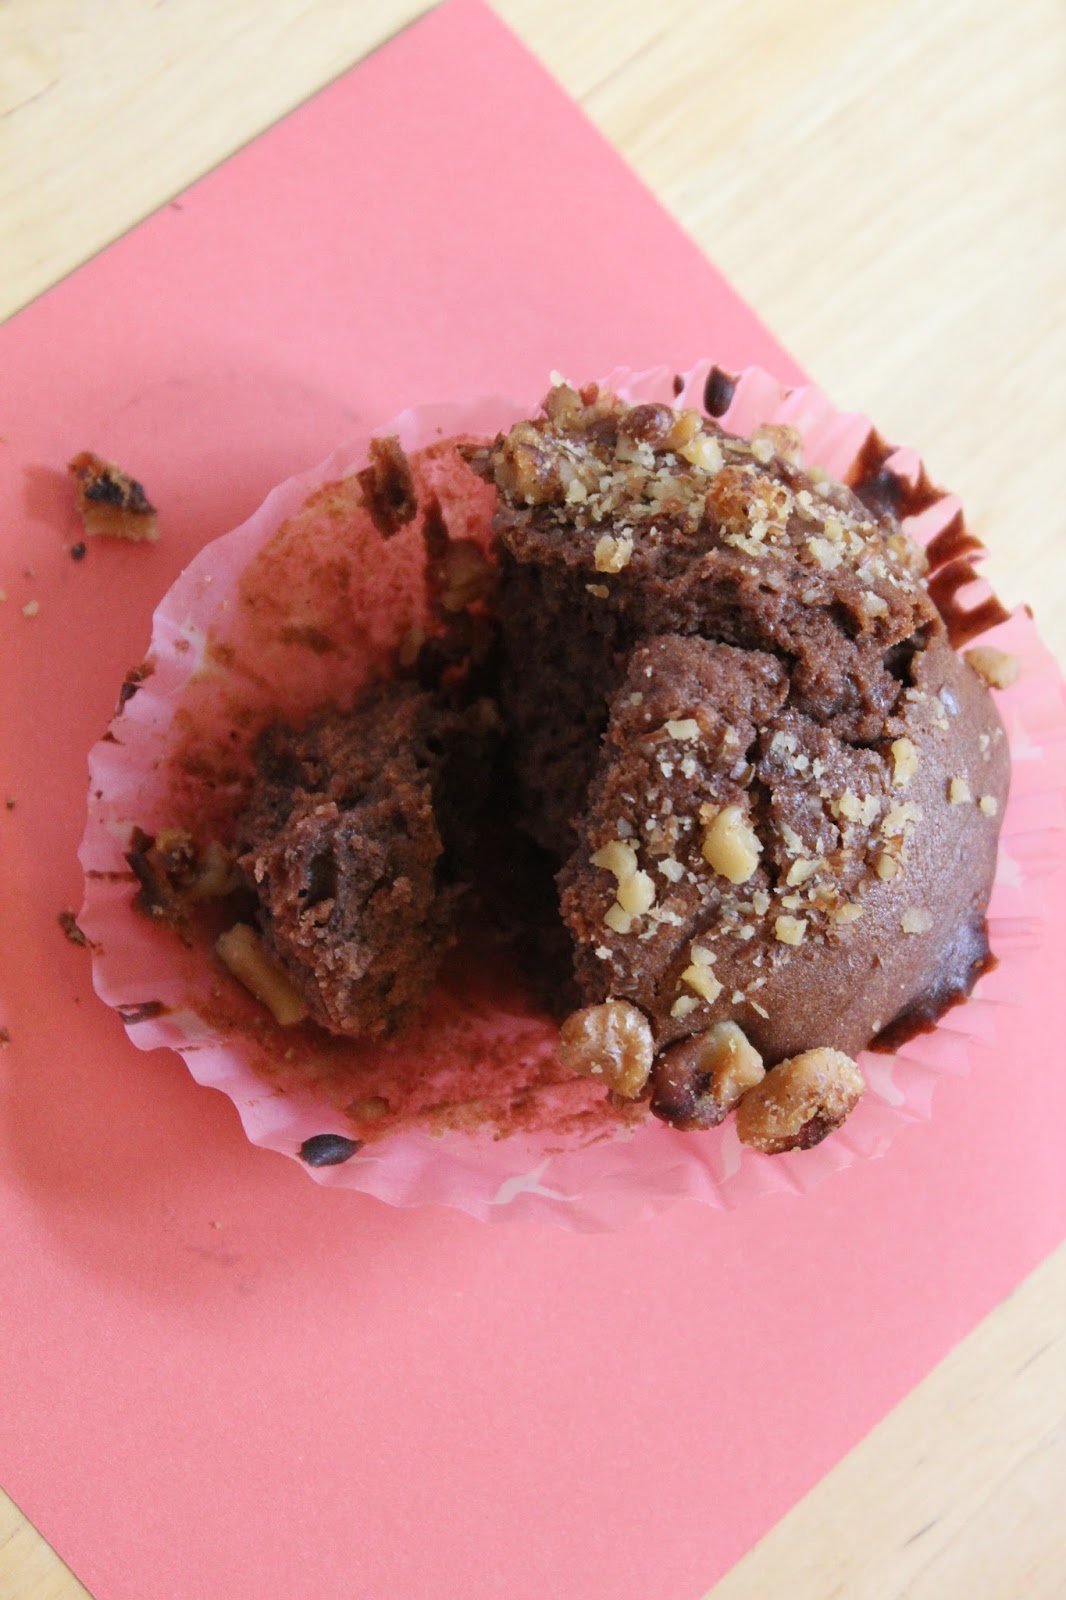
Chocolate and condensed milk muffins
I had some friends over the other day for brunch and the night before, my lovely other half suddenly told me: "We should make something sweet". Panic! Luckily, I had some dark chocolate (not enough though) and a can of sweetened condensed milk left in my cupboard and took inspiration from an old recipe to whip up those muffins.
Although they turned out really nice, I would suggest serving them fresh out of the oven, still slightly warm. Here are the ingredients I needed to make them.

To make 12 muffins you need:
100 g of dark chocolate
150 g of butter
3 eggs
A can of sweetened condensed milk
150 g of flour
70 g of walnuts
1 tsp of baking powder
A pinch of salt

1. Preheat your oven to 180°C. In a micro-wave safe bowl, break the chocolate and cut the butter into small chunks and heat for a couple of minutes (you can get the same result by placing your bowl over a small pan of simmering water but using the micro-wave is just a bit quicker).
2. In a big bowl, break the eggs, add the condensed milk as well as your mixture of butter and chocolate and whisk together.
3. Add the flour, half of the walnuts broken into small bits, the salt and baking powder and whisk again until you get a smooth mixture.
4. Place your mixture into muffin cases in a muffin tray, sprinkle the remaining bits of walnut on top and bake for 20-25 mins. Before switching off your oven, make sure the muffins are fully baked by inserting a knife into one of them.
I used walnuts but you can use whatever tickles your fancy (hazelnuts, chocolate chips, candied orange peel...be the master of your own muffins!)
Sunday, 28 July 2013
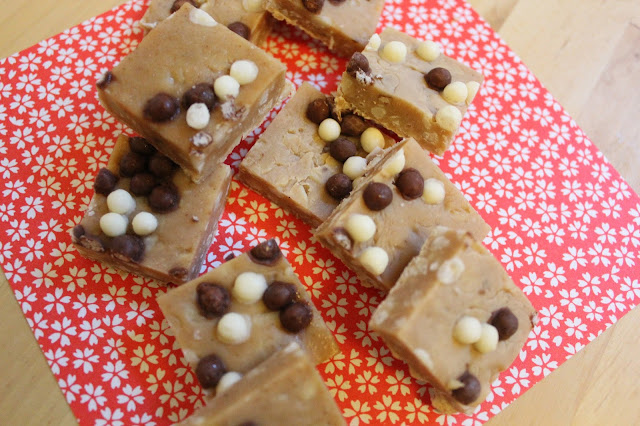
Marshmallow and white chocolate fudge
A clever, easy twist on a classic recipe...here, marshmallows simply replace the sugar. In under 25 minutes, this fudge will be ready but... you'll need to wait another three hours for it to be set. So cruel to have to wait so long but it's worth it! The recipe is inspired by the French cookery book 'Chamallows. Les 30 recettes cultes'.
To make the fudge you need;
20 marshmallows
120 ml of single cream
120 g of sugar
10 g of butter
1 tsp of vanilla extract
160 g of white chocolate
80 g of peanuts or any other nuts
A pinch of salt
Some oil

1. In a small pan, add together the cream, marshmallows, sugar and salt. Bring to the boil and stir continuously. Using a sugar thermometer, bring the mixture to 114°C then add the butter and vanilla extract. Stir well.
2. Chop the white chocolate and add to the mixture together with the nuts.
3. Line a square or rectangular tin with oiled baking paper on both sides. Poor your mixture and decorate it, if you wish, with little bits of white chocolate or any other cake decoration (here I used the little crunchy balls that you get with some yogurts, that's all I could find at the time).
4. Leave to set for at least three hours and then enjoy!


To make the fudge you need;
20 marshmallows
120 ml of single cream
120 g of sugar
10 g of butter
1 tsp of vanilla extract
160 g of white chocolate
80 g of peanuts or any other nuts
A pinch of salt
Some oil

2. Chop the white chocolate and add to the mixture together with the nuts.
3. Line a square or rectangular tin with oiled baking paper on both sides. Poor your mixture and decorate it, if you wish, with little bits of white chocolate or any other cake decoration (here I used the little crunchy balls that you get with some yogurts, that's all I could find at the time).
4. Leave to set for at least three hours and then enjoy!

Sunday, 30 June 2013
Dark and white chocolate flowers
These flowers are really easy to make and yet look great with their black (the biscuit) and white (the ganache) contrast. I've shaped them as flowers just because I used the cookie cutters I have. But any shape will do. And they're so yum they disappear in a flash...see below!

To make 12 biscuits you need:
300 g of plain flour
25 g cocoa powder
120 g of icing sugar
200 g of butter
1 tsp vanilla extract
1 egg
200 g white chocolate
100 ml single cream

1. In a bowl, beat the butter until soft then add the icing sugar, vanilla extract and a pinch of salt. Add the egg and whisk until smooth. Sieve together the flour and cocoa powder and add to the mixture. Once well combined, cover the dough with cling film and leave to rest for at least two hours in the fridge.
2. Preheat the oven to 150°C. Roll out your dough and cut out 24 shapes, or more, with a 6 cm-diameter cookie cutter. With another 3 cm-cookie cutter, remove the centre of half the shapes. Bake your shapes on a baking tray lined with baking sheet for 15 minutes. Leave to cool.

3. To make the white chocolate ganache, melt the white chocolate in a bowl placed over a small saucepan of simmering water. Separately, boil the cream and add to the white chocolate until you get a smooth mixture. Leave to set in the fridge.
4. On each full biscuit, place one teaspoon of ganache and cover with a hollowed biscuit. Et voila!

Subscribe to:
Comments (Atom)